 Save
Save Standing in my kitchen just before a high school graduation party, I could feel a gentle tug between nerves and excitement as the vanilla scent warmed the whole house. The music was on low, and it felt like every ingredient joined in the celebration. For the first time, I attempted piping 'Class of 2026' across a giant sheet cake, squeezing the bag with shaky hands and laughing when I almost spelled '2062' instead. There’s something about decorating a cake for such a big milestone that makes you appreciate the simple act of mixing flour and sugar. This dessert became my tribute to new beginnings and the sweet reward at the end of hard work.
I remember icing this cake on a sunny afternoon while cousins crowded around the counter, suggesting wild color combinations for the piping and daring me to use all the sprinkles. Someone helped steady the piping bag, and conversation drifted between college plans and favorite flavors, turning a kitchen task into a group effort filled with laughter. When the frosting ran low, we improvised with extra milk and watched as 'Class of 2026' came together, uneven but proud. Even the small messes felt celebratory. It was one of those moments where the cake became a centerpiece for togetherness rather than just dessert.
Ingredients
- All-purpose flour: Choosing unbleached flour gives the cake a tender crumb, and careful sifting helps avoid lumps.
- Baking powder: Accurate measuring means a reliable rise—never skip the leveling step.
- Salt: A small amount sharpens the sweetness and balances the flavor.
- Unsalted butter: Room temperature butter blends more smoothly for fluffier cake and frosting; don’t rush the softening.
- Granulated sugar: Slow mixing with butter builds airiness—this is where the moistness begins.
- Eggs: Use room temperature eggs to make emulsification easier and the batter silkier.
- Vanilla extract: Real vanilla’s aroma ties the whole cake together, so use the best you can find.
- Whole milk: Don’t substitute with skim; milk gives richness and stability.
- Powdered sugar: Sift before using, and you’ll avoid frosting clumps for that perfect smooth finish.
- Food coloring: Gel-type colors let you get vibrant results without watering down the buttercream.
- Sprinkles, edible glitter, or colored sugar: Optional, but the sparkle makes graduation photos pop.
Tired of Takeout? 🥡
Get 10 meals you can make faster than delivery arrives. Seriously.
One email. No spam. Unsubscribe anytime.
Instructions
- Prep Your Pan:
- Grease and line your 13x18-inch sheet pan with parchment paper, letting edges overhang for easy lift. The rustle of parchment helps set an optimistic tone.
- Mix Dry Ingredients:
- Whisk flour, baking powder, and salt until evenly blended—try to enjoy the soft motion of flour beneath your fingers.
- Cream Butter and Sugar:
- Beat butter and sugar together until pale and fluffy, about 3 minutes. The mixture should look like whipped clouds and smell sweetly rich.
- Add Eggs and Vanilla:
- Add eggs one at a time, beating well after each, then mix in vanilla. The batter will gain gloss and structure at this stage.
- Combine Wet and Dry:
- Add dry ingredients in three portions, alternating with milk. Use gentle strokes and don’t overmix—just until it all comes together and feels silky.
- Bake:
- Pour batter into pan and smooth the top with an offset spatula. Bake at 350°F for 30–35 minutes, checking for a clean toothpick in the cake's center.
- Cool Completely:
- Let your cake rest in the pan on a wire rack. It's tempting to frost early, but patience pays off for both flavor and texture.
- Make Buttercream:
- Beat room temperature butter until creamy, gradually add powdered sugar, then vanilla and milk, until frosting is smooth and spreadable. It should feel light and silky, never grainy.
- Divide and Color:
- Portion out the frosting and tint with gel colors; mix thoroughly until you see no streaks. School colors and a touch of black will give your piping extra pop.
- Frost and Decorate:
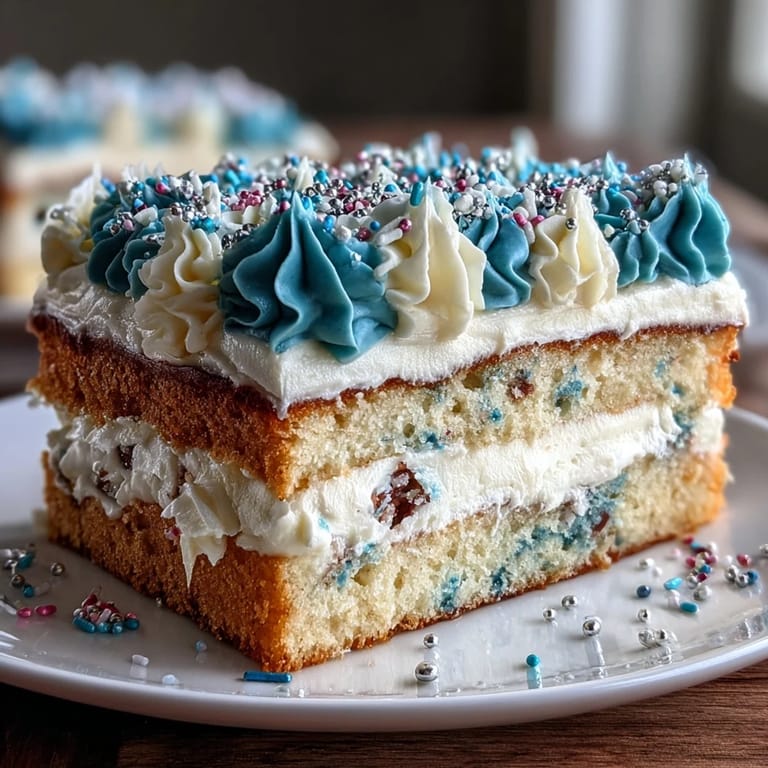
- Spread a thick, smooth layer of frosting over the cooled cake. Use piping bags to create borders and write 'Class of 2026'—then sprinkle on edible glitter for a festive finish.
- Chill to Set:
- Refrigerate the decorated cake for at least 30 minutes so the frosting holds its shape and colors don't bleed. This step makes slicing clean and easy.
 Save
Save At one graduation, someone cried over how pretty the cake looked, and I realized these simple homemade touches became as cherished as the diplomas. While taking pictures, my own hands ended up covered in frosting, and I couldn’t help but feel proud watching classmates pose around the dessert I’d made. For a brief moment, the cake was more than food—it was a tangible part of celebration and accomplishment.
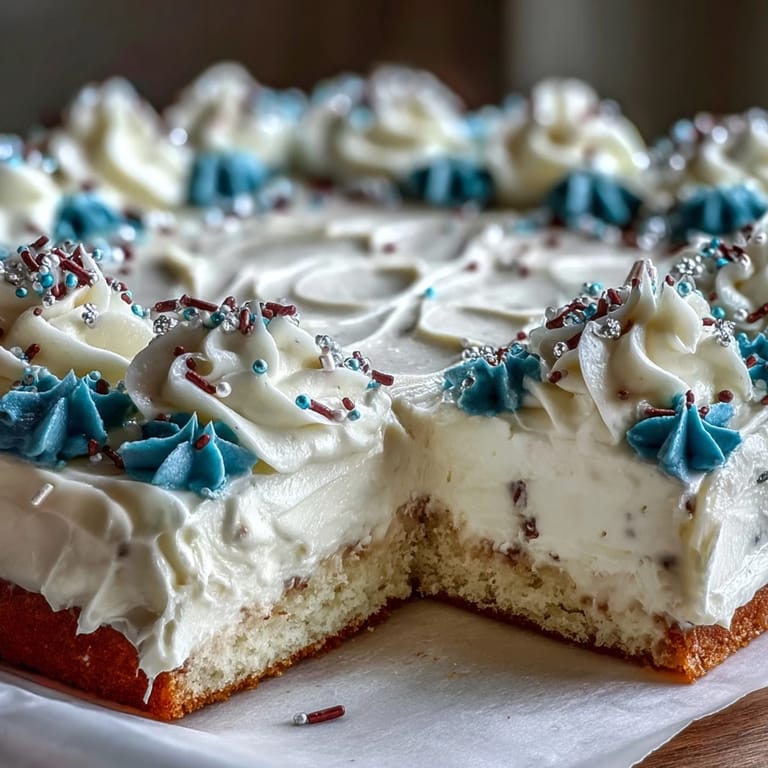
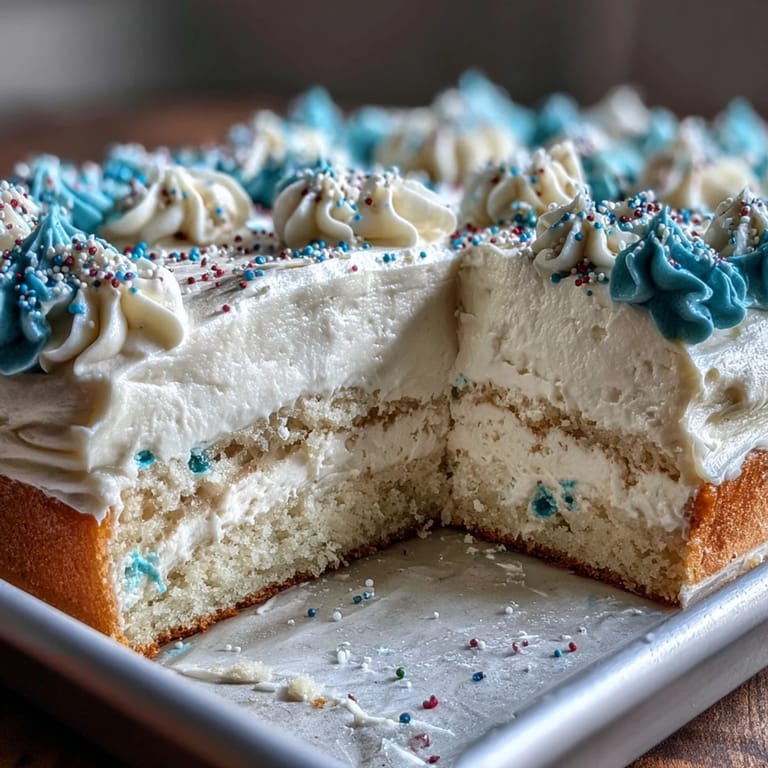
Choosing School Colors for Buttercream
It’s amazing how just a dab of gel food coloring can transform plain frosting into something spirited—mix lighter shades for borders and reserve bolder hues for writing. Sometimes layering two tones adds dimension, and pairing them with glitter creates a playful effect. Don’t be afraid to test out color combos on a small plate before committing to the whole batch. The right color makes the message stand out and brings extra cheer to the party.
Ensuring Moistness in Large Sheet Cakes
Baking a cake this size can sometimes lead to dry edges, so I always rotate the pan halfway through for even heat. Measuring ingredients precisely really makes a difference, and I’ve found a little extra milk helps when humidity is low. Covering the cooled cake tightly before frosting prevents it from drying out as well. All these steps keep each slice soft and satisfying.
Showstopping Piping Tips for Graduation Cakes
Piping the class year takes patience—use a round tip for clean letters and a star tip for fun borders. If the buttercream feels warm, refrigerate it briefly so designs hold sharp edges. Practice writing on parchment first to gain confidence, and hold the piping bag just above the cake for best results.
- Short bursts of pressure give you crisp letters.
- Don’t rush—steady hands make the message clear.
- Finish decorating before adding sprinkles, so they don’t interfere with the piping.
 Save
Save There’s genuine magic in serving a cake celebrating both achievement and togetherness. Share each slice and let the frosting become your own sweet memory at the end of a milestone day.
Recipe FAQs
- → How can I achieve vibrant colors for the buttercream?
Use gel food coloring to tint your buttercream—it's concentrated and won't thin the frosting, resulting in bold hues.
- → Can I make this cake in advance?
Yes! Bake and decorate the cake up to two days ahead. Store covered in the refrigerator for freshness.
- → How do I create the Class of 2026 piping?
Fill piping bags with colored buttercream and use writing or star tips to add the Class of 2026 design on cooled cake.
- → Is there a chocolate variation for this cake?
Substitute ½ cup of flour with unsweetened cocoa powder for a chocolate twist on the classic sheet cake.
- → What pan size is best for serving a crowd?
A 13x18-inch sheet pan yields 24 generous servings, ideal for graduation parties and gatherings.