 Save
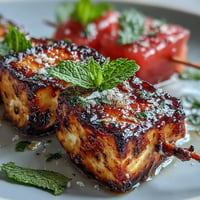
Save The first time I made panini at home, I was amazed at something so simple could taste so extraordinary. I'd pressed sandwiches in a skillet with a cast iron skillet on top, but finally getting a proper panini press changed everything. Those perfect grill marks and the way cheese oozes out just enough to get crispy and golden—that's the kind of kitchen magic that turns lunch into an event. My daughter now calls them fancy grilled cheese and requests them weekly.
Last summer during a rainy week, we had friends over for what was supposed to be a quick lunch but turned into a fullblown panini tasting party. Everyone built their own combinations from what I'd prepped, and we spent three hours pressing sandwiches and eating them standing up in the kitchen. Something about warm, pressed food makes people gather and stay longer.
Ingredients
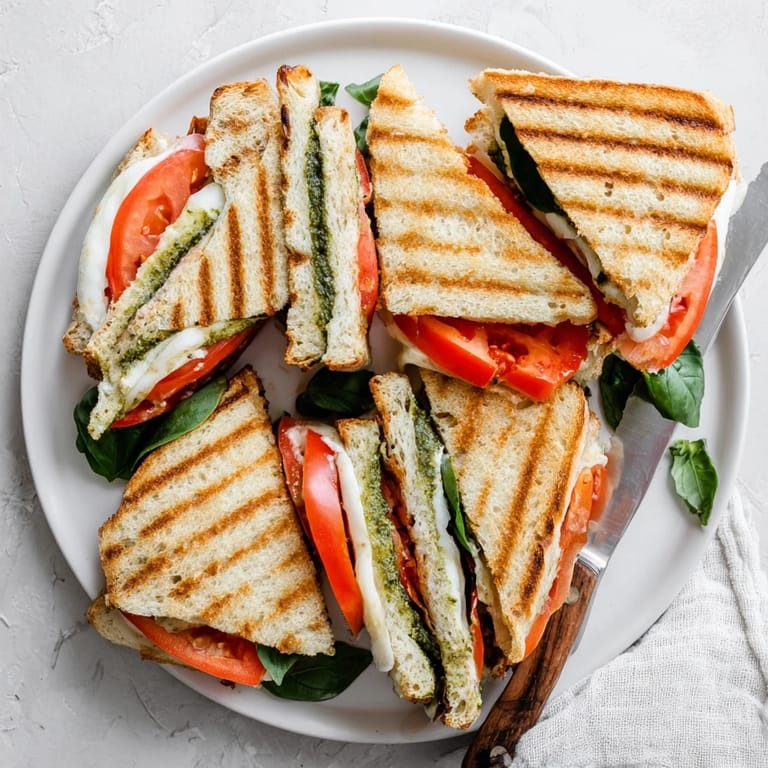
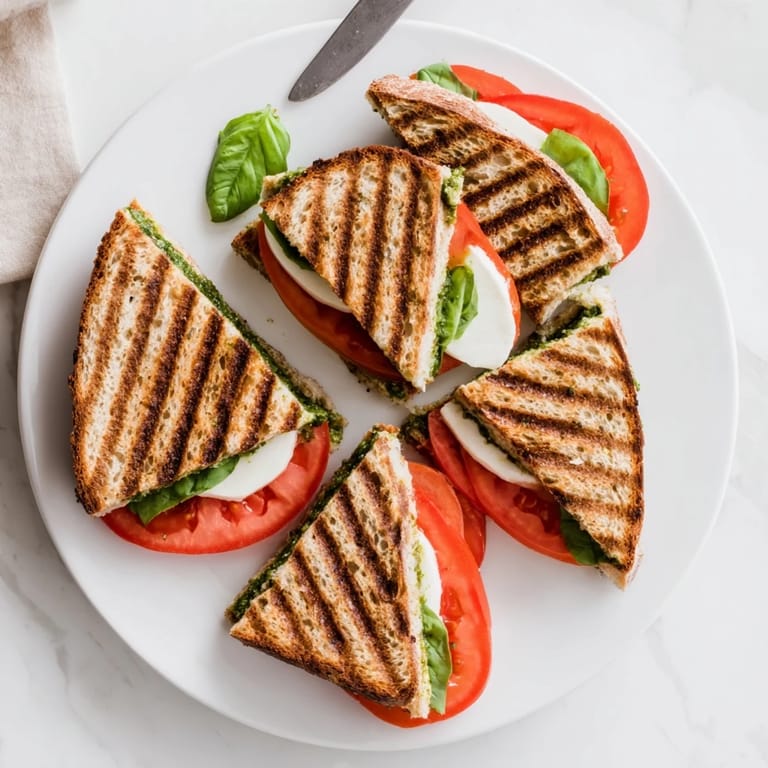
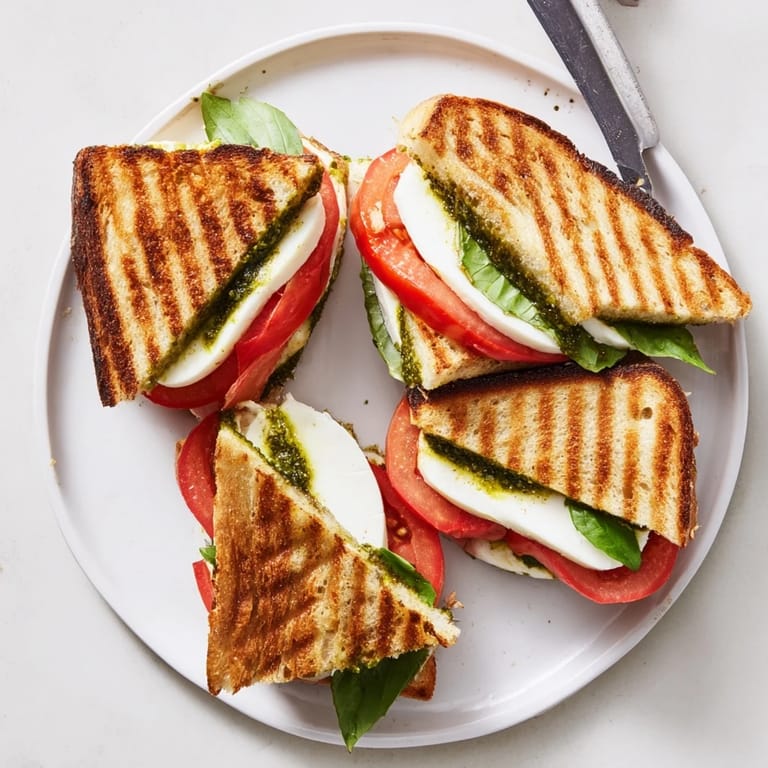
- Sourdough or ciabatta bread: These sturdy breads hold up beautifully to pressing without getting squished or soggy
- Fresh mozzarella: Creamy and mild, it melts perfectly without becoming greasy
- Basil pesto: Spread it thin—a little goes a long way and adds incredible depth
- Ripe tomatoes: Pat them dry with paper towels to prevent your bread from getting soggy
- Fresh basil leaves: Add them whole and let them wilt slightly in the heat for maximum flavor
- Multigrain bread: Adds nuttiness and texture that pairs perfectly with turkey and cranberry
- Cranberry sauce: Use a good quality sauce, preferably one with whole berries
- Swiss cheese: Its mild nutty flavor complements both the turkey and the sweetness of cranberry
- Baby spinach: Adds fresh crunch and a pop of color without overwhelming other flavors
- Focaccia or rustic bread: The herbs and olive oil in focaccia add built-in flavor
- Grilled eggplant and zucchini: Grill them ahead of time and they'll be even better in the sandwich
- Roasted red peppers: Jarred ones work beautifully here, just pat them dry
- Feta cheese: Its tanginess cuts through the richness of grilled vegetables
- Hummus: Use your favorite flavor—classic garlic or roasted red pepper both work wonderfully
- Cooked chicken breast: Rotisserie chicken works perfectly here and saves time
- BBQ sauce: Choose one you love—sweet, smoky, or spicy based on your preference
- Pepper jack cheese: Adds just enough heat to balance the sweet BBQ sauce
- Red onion: Thinly sliced, it mellows beautifully when pressed
- Olive oil or butter: Brush lightly—you want golden crispy bread, not soggy or greasy
Tired of Takeout? 🥡
Get 10 meals you can make faster than delivery arrives. Seriously.
One email. No spam. Unsubscribe anytime.
Instructions
- Preheat the panini press:
- Plug it in and let it get fully hot before adding any sandwiches
- Prep your ingredients:
- Have everything sliced, grated, and ready before you start assembling
- Choose your bread:
- Lay out two slices per sandwich and decide which side will be inside
- Spread your base layer:
- Add pesto, cranberry sauce, hummus, or BBQ sauce to the inside of both bread slices
- Layer your fillings:
- Start with cheese on both slices, then add your meats, veggies, and greens
- Close and prepare for pressing:
- Put the top slice on and lightly brush or butter the outside of both bread pieces
- Press to perfection:
- Carefully place in the hot press and close gently
- Watch for golden magic:
- Cook 4–6 minutes until those signature grill marks appear and cheese is melted
- Rest briefly before slicing:
- Let them sit for just one minute so the filling sets
- Slice diagonally:
- Cut on an angle and serve immediately while still hot
 Save
Save These panini have saved me countless weeknight dinners and Sunday lunches when inspiration runs low. There's something deeply satisfying about taking simple ingredients and transforming them into something that feels special. My teenagers actually request vegetables when they're pressed inside a sandwich with feta and hummus.
Bread Selection Secrets
After making dozens of panini, I've learned that bread choice can make or break the result. Dense artisan breads with some structure work best—soft white bread tends to get squished and sad. I keep a variety of breads in my freezer and thaw slices as needed, so we're always ready for panini night.
Make Ahead Magic
You can prep all your components in advance, but assemble right before pressing for the best texture. I'll often grill vegetables and slice cheese on Sunday, then throughout the week, quick panini come together in minutes. It's how I make homemade lunches feel possible on busy weekdays.
Press Without a Press
Don't let lack of equipment stop you from enjoying pressed sandwiches at home. Use a skillet over medium heat, place your sandwich in the pan, then weight it down with another heavy skillet or a foil-wrapped brick. Flip halfway through and you'll get surprisingly similar results.
- A cast iron skillet makes the perfect weight when you don't have a press
- Cook over medium-low heat to give the cheese time to melt before bread burns
- Press down gently with your spatula for extra crisping power
 Save
Save There's nothing quite like the sound of a panini press sizzling or that first bite of crispy, melty perfection. Make these for someone you love.
Recipe FAQs
- → What type of bread works best for pressed sandwiches?
Sourdough, ciabatta, focaccia, and country-style breads excel in panini presses. Their sturdy structure holds fillings securely while developing appealing golden crunch. Multigrain and rustic varieties also perform beautifully.
- → How long should I press each sandwich?
Cook for 4–6 minutes depending on bread thickness and filling quantity. Visual cues include golden-brown grill marks and crisp exterior texture. Cheese should be fully melted and fillings heated through.
- → Should I butter or oil the bread exterior?
Both options create excellent results. Butter offers rich flavor while olive oil provides lighter Mediterranean notes. Apply sparingly to achieve even crisping without excess grease.
- → Can I make these without a panini press?
A grill pan or heavy skillet works well. Use another weighted pan or foil-wrapped brick on top to press sandwiches down. Flip halfway through cooking for even browning on both sides.
- → What's the best way to layer ingredients?
Spread sauces directly on bread interiors to prevent sogginess. Layer cheese next to bread for optimal melting. Place vegetables and meats between cheese layers, keeping delicate greens toward the center.
- → How do I prevent bread from getting soggy?
Thoroughly grill vegetables beforehand to remove excess moisture. Apply sauces lightly and avoid overfilling. Serve immediately after pressing for optimal texture contrast between crisp exterior and warm interior.