 Save
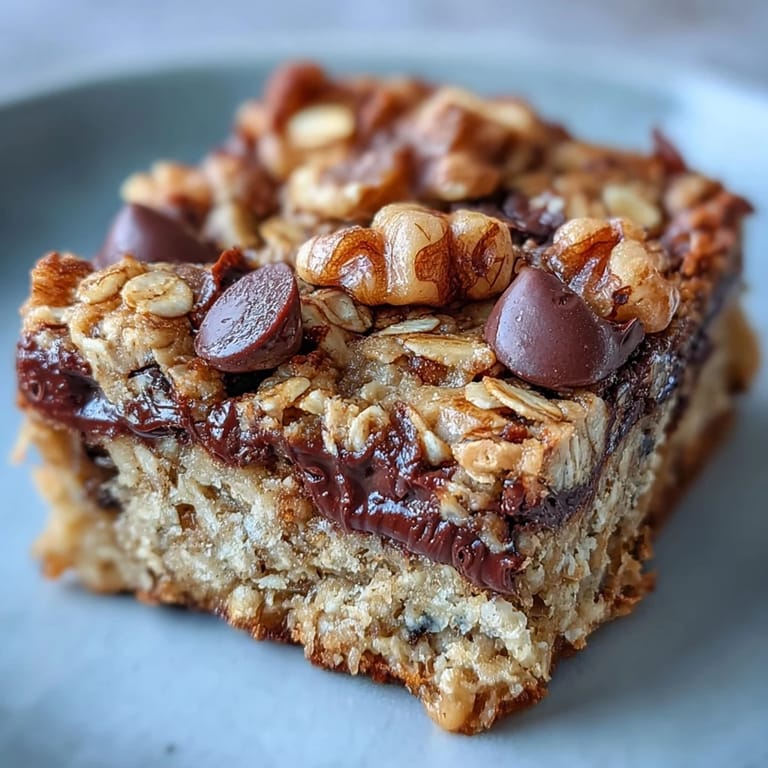
Save My gym buddy swears by these bars, and after stealing one from her gym bag on a Tuesday morning, I understood the obsession immediately. There's something magical about a baked good that tastes like dessert but actually fuels your day—no guilt, just satisfaction. I started making them on Sunday afternoons while half-listening to a podcast, and now they're my answer to every "what's for breakfast" moment. The banana, chocolate, and walnut combo hits differently when it's warm from the oven.
I brought a batch to a hiking trip last spring, and watching three different people grab one without asking told me everything I needed to know about whether they'd become a staple. They held up beautifully in a backpack, didn't crumble into dust, and somehow tasted even better eaten sitting on a mountain ridge with cold coffee.
Ingredients
- Ripe bananas (2 large, mashed): Use ones with brown spots—they're sweeter and break down more easily, creating that naturally sticky base that holds everything together.
- Unsweetened applesauce (1/2 cup): This adds moisture without adding refined sugar; it's the quiet hero that keeps bars tender even after a few days.
- Maple syrup or honey (1/4 cup): Pick whichever you have on hand—they both bring depth and help with binding.
- Unsweetened almond milk (1/4 cup): Thin enough to incorporate smoothly without making the batter wet and heavy.
- Egg (1 large, or flax egg for vegan): This is your binder and structure—don't skip it, and if going vegan, let that flax egg rest those full 5 minutes or it won't work properly.
- Pure vanilla extract (1 tsp): Vanilla deepens all the other flavors, especially the chocolate and banana.
- Old-fashioned rolled oats (2 cups): The backbone of the bars—they create a hearty texture that feels satisfying.
- Protein powder (1/2 cup, vanilla or chocolate): This is what makes them actually good for you; chocolate powder plays nicer with the other flavors, but vanilla won't compete.
- Chopped walnuts (1/2 cup): Toast them lightly if you have time—it brings out their nuttiness and makes every bite crunchier.
- Dark chocolate chips (1/3 cup): The dark variety balances the banana sweetness rather than turning these into a candy bar.
- Shredded coconut (1/4 cup, optional): Adds chewiness and subtle tropical notes if you're feeling adventurous.
- Ground cinnamon (1/2 tsp): Warms everything up and makes the banana taste more pronounced.
- Fine sea salt (1/4 tsp): Trust this—it rounds out sweetness and makes every flavor pop.
- Baking powder (1 tsp): Gives you a slightly tender crumb rather than a dense brick.
Tired of Takeout? 🥡
Get 10 meals you can make faster than delivery arrives. Seriously.
One email. No spam. Unsubscribe anytime.
Instructions
- Get Your Oven Ready:
- Heat to 350°F and line your pan with parchment paper so you can lift the whole thing out later without wrestling with scraping. Trust me on this.
- Build the Wet Base:
- Mash those bananas until there are barely any lumps—they should look almost like applesauce themselves. Whisk in the applesauce, syrup, milk, egg, and vanilla until it's smooth and homogeneous; you want no streaks of white egg.
- Combine Your Dry Mix:
- In a separate bowl, stir together oats, protein powder, walnuts, chocolate chips, coconut if using, cinnamon, salt, and baking powder. This keeps the baking powder distributed evenly so you don't end up with random pockets of aftertaste.
- Marry Wet and Dry:
- Pour the wet mixture into the dry ingredients and fold gently with a spatula until just combined—about 15-20 strokes. Overmixing develops gluten and toughens the bars; you want soft crumb.
- Into the Pan:
- Spread the batter evenly into your prepared pan using the spatula; if you want, scatter extra chocolate chips and walnuts on top for a little visual promise. The batter will be thick and slightly sticky, which is exactly right.
- The Bake:
- Bake for 25-28 minutes until the top is golden and the edges pull slightly away from the pan. A toothpick poked in the center should come out clean or with just a crumb or two—not wet, not dry.
- Cool and Slice:
- Let them cool completely in the pan (patience here prevents crumbling), then use the parchment to lift the whole slab out and slice into 12 pieces with a sharp knife.
 Save
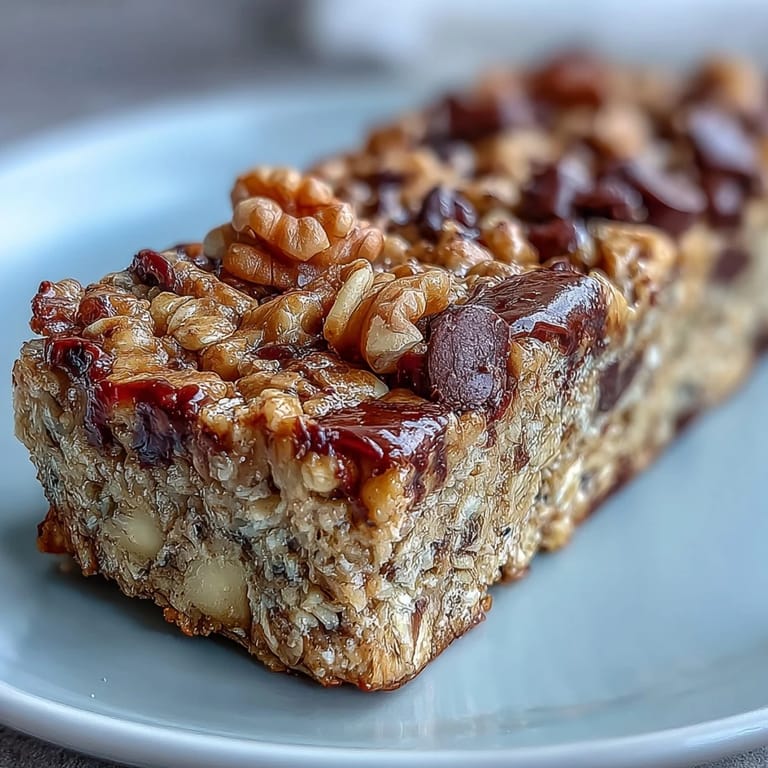
Save My roommate once grabbed one straight from the cooling pan and burned the roof of her mouth, then immediately grabbed another anyway. That's when I knew these weren't just practical meal prep—they were genuinely craveable.
Storage and Longevity
These bars are designed to last, which is half their appeal. At room temperature in an airtight container, they stay soft and chewy for three days; in the fridge, you get a full week. For longer storage, wrap individual bars in parchment and freeze them for up to three months—they thaw in about an hour on the counter or you can eat them slightly frozen, which honestly tastes like a treat.
Flavor Swaps and Variations
Once you've made these once, you'll start seeing variations everywhere. Swap walnuts for pecans or almonds depending on what's in your pantry; try white chocolate chips instead of dark if you're feeling lighter; add a handful of dried cranberries or raisins for chewiness. Some mornings I'll toss in a tablespoon of cocoa powder to deepen the chocolate notes, and other times I'll go extra coconut for a tropical vibe.
Making These Vegan and Allergy-Friendly
The egg can be replaced with a flax egg—mix one tablespoon of ground flaxseed with two and a half tablespoons of water, let it sit for five minutes until it thickens, and proceed. The bars won't rise quite as much but they'll still be delicious and hold together beautifully. For nut allergies, sunflower seeds work as a direct swap, and any chocolate chips labeled dairy-free will play nicely with the rest of the ingredients. Just double-check your protein powder label because some brands sneak in unexpected allergens.
- Always read protein powder labels carefully—some contain tree nuts, dairy, or soy even if it's not obvious from the name.
- A flax egg needs its full resting time to thicken, or your bars will be gummy instead of chewy.
- If you're avoiding tree nuts entirely, sunflower seed butter can replace the walnuts, and the texture stays just as satisfying.
 Save
Save These bars have become my secret weapon for mornings when I need something fast but don't want to feel like I'm eating an afterthought. Make a batch on Sunday and you'll understand why they're a kitchen staple.
Recipe FAQs
- → Can I make these bars vegan?
Yes, substitute the egg with a flax egg (1 tbsp ground flaxseed mixed with 2.5 tbsp water, rested for 5 minutes) to keep the same texture and binding.
- → What nuts work best in this mix?
Walnuts add a rich flavor and crunch, but you can replace them with pecans or almonds depending on your preference.
- → How should I store these bars?
Store in an airtight container at room temperature for up to 3 days, refrigerate up to a week, or freeze for longer freshness.
- → Can I use different protein powders?
Yes, feel free to use vanilla or chocolate protein powder as preferred. Just check for any added ingredients if avoiding dairy or soy.
- → What is the best way to tell when bars are done baking?
Bake until golden and set, about 25–28 minutes. A toothpick inserted should come out mostly clean for the ideal texture.