Save
Save My daughter burst through the kitchen door one March afternoon, clutching a flyer about her school's Easter party, and suddenly I was tasked with bringing something that would make the other kids' eyes light up. I wanted dessert that looked fancy but wouldn't require me to bake—something I could actually pull together while she did her homework. These dirt cups were born from that moment of inspiration, and now they're the first thing she requests when spring rolls around.
The first time I made these for a group, I was nervous about whether they'd seem too simple or childish for the adults at the table. Someone's grandmother took a bite, smiled, and said it reminded her of making mud pies as a kid, which somehow made everyone relax and enjoy the moment. That's when I realized these cups aren't really about impressing anyone—they're about creating a little bit of joy and nostalgia in dessert form.
Ingredients
- Instant chocolate pudding mix (3.4 oz, 1 box): This is the workhorse ingredient that saves you from standing over a stove, and cold milk whisks it into silky perfection in just two minutes.
- Cold whole milk (2 cups): Cold milk is non-negotiable here because it helps the pudding set properly without any lumps getting in the way.
- Oreo cookies, crushed (18 cookies, regular or golden): Crushing these by hand in a bag is actually therapeutic, and you want them fine enough that they pack down like real dirt but still have some texture.
- Whipped topping (1 cup, like Cool Whip): You can use homemade whipped cream if you're feeling fancy, but the store-bought stuff holds its shape longer and makes piping easier.
- Marshmallow bunny candies or chocolate bunnies (6-12): These are your little garden creatures peeking out from the dirt, and kids love spotting them.
- Pastel-colored sprinkles (1/4 cup): They look like flower petals scattered across a garden, so don't skip them for visual impact.
- Mini candy eggs (1/3 cup, optional): These add another layer of Easter magic and hide nicely in the crushed cookie layers.
- Fresh mint sprigs (6 small pieces, optional): A touch of real mint makes it feel garden-fresh and gives the whole thing a surprising garden-like quality.
Tired of Takeout? 🥡
Get 10 meals you can make faster than delivery arrives. Seriously.
One email. No spam. Unsubscribe anytime.
Instructions
- Whisk and wait for the pudding:
- Pour the pudding mix and cold milk into a bowl and whisk steadily for a full two minutes—you'll feel it thicken under your whisk, which is oddly satisfying. Let it sit for another five minutes so it sets completely and loses any grainy texture.
- Crush the cookies into submission:
- If you have a food processor, pulse the Oreos until they look like fine breadcrumbs with just a few slightly bigger pieces for texture. If you're using the bag-and-rolling-pin method (which I often do), seal them tight and crush away—it's quiet enough for early mornings and kind of meditative.
- Build the first dirt layer:
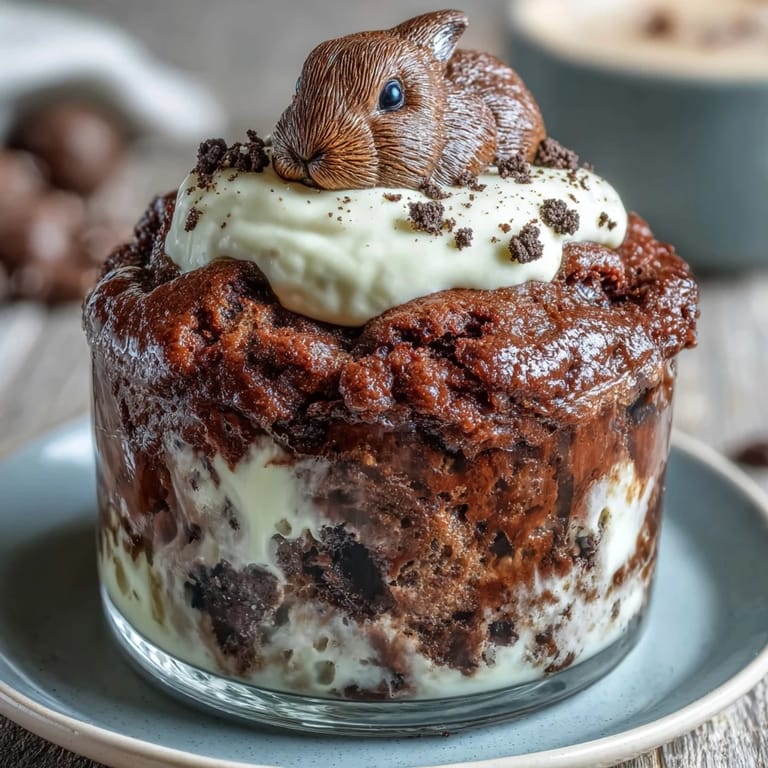
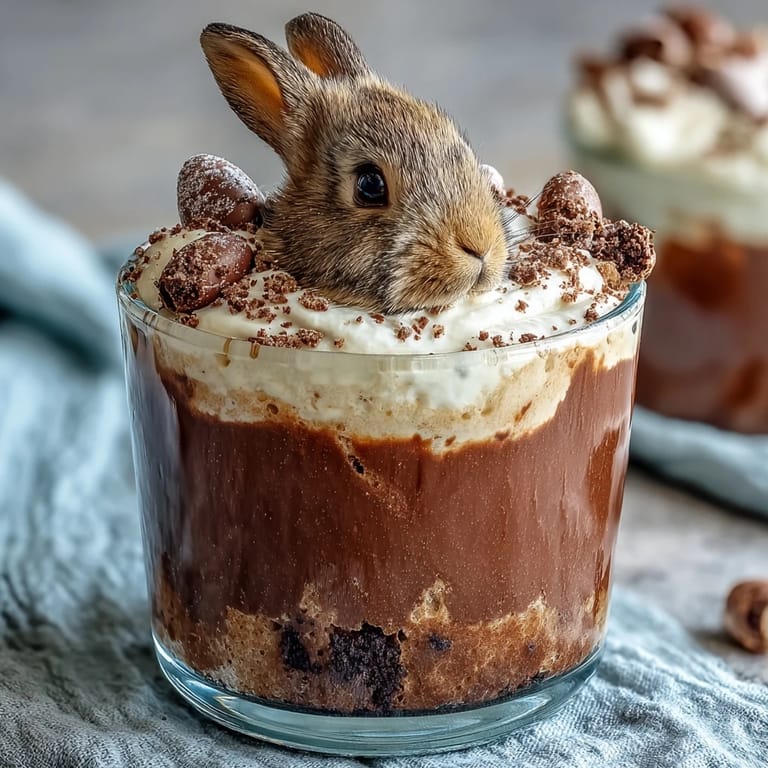
- Spoon about two tablespoons of crushed Oreos into the bottom of each clear cup, pressing down gently so it's compact and looks like actual packed earth. The clear cup is important because the layers are half the appeal.
- Add the chocolate pudding:
- Divide the pudding evenly among your six cups, spooning it right over the cookie layer—you'll see how the dark chocolate contrasts beautifully against the cookie crumble.
- Create the second dirt layer:
- Top each pudding layer with another two tablespoons of crushed Oreos to really cement that garden-soil illusion. This layer is what makes people do a double-take when they see it.
- Crown with whipped topping:
- Spoon or pipe a generous dollop of whipped topping in the center of each cup—this is where the bunny will sit like it's basking in the spring sun. If you have a piping bag, this step feels a little fancier, but a spoon works just fine.
- Decorate like you're planting a garden:
- Now comes the fun part—nestle bunny candies on top of the whipped cream, scatter pastel sprinkles around like flower petals, tuck mini eggs into the dirt layers, and add a tiny sprig of mint for that fresh grass effect. There's no wrong way to do this, so let your mood guide the design.
- Chill or serve right away:
- These are best served immediately while everything is fresh and the chocolate pudding is still cool, though you can refrigerate them for a few hours if needed. Just don't leave them longer than overnight or the Oreos will start absorbing moisture and lose their textural contrast.
 Save
Save What stuck with me most was watching a shy kid at the party actually ask for seconds and tell his mom that dirt never tasted so good. That's the secret power of these cups—they give permission to be playful about food, which somehow makes everything taste better.
Why Clear Cups Actually Matter
The first time I tried making these in opaque mugs, I realized I'd removed ninety percent of the appeal. The whole point is that people see those distinct layers of dark cookie, rich chocolate, and fluffy topping stacked up like an edible landscape. When you use clear cups, even a simple dessert becomes a little moment of visual discovery every time someone lifts it to take a bite.
The Cookie Crushing Method That Changes Everything
I spent years thinking I needed a food processor for this step until I realized that a zip-top bag and a rolling pin actually give you more control over the texture. You can feel when you've reached that perfect consistency where the cookies are mostly powder but still have a few pea-sized pieces mixed in, which creates that authentic sandy-soil feel. Plus, there's something satisfying about the whole process—kids love helping with this part, and it keeps them invested in the final result.
Make-Ahead Wisdom and Storage Tips
These cups are genuinely better made no more than a few hours before serving because the Oreo layer will gradually soften as it absorbs moisture from the pudding, which changes the whole textural experience. I've learned the hard way that assembling them in the morning and serving them at dinner results in a slightly mushy bottom layer, whereas assembling them an hour before party time keeps everything at peak crunchiness. The whipped topping holds up fine if refrigerated, but the overall magic fades after about twelve hours.
- If you're making these the night before, keep the Oreo layers separate and assemble just before serving.
- You can prepare the pudding hours in advance and store it covered in the refrigerator.
- Transport these carefully since they're in individual cups—a cookie sheet with sides keeps them steady on the drive to wherever you're going.
 Save
Save These dirt cups have become my go-to whenever I need a dessert that looks impressive but won't stress me out in the kitchen. There's something wonderful about serving something playful that brings everyone—kids and adults alike—back to that feeling of simple, uncomplicated joy.
Recipe FAQs
- → Can I make this dessert dairy-free?
Yes, substitute the instant chocolate pudding with a dairy-free mix and use plant-based milk and whipped topping alternatives.
- → How do I crush the cookies evenly?
Use a food processor for uniform crumble or place cookies in a sealed bag and crush gently with a rolling pin.
- → Can I prepare these cups in advance?
These cups can be assembled a few hours ahead and refrigerated, but are best served within 24 hours for optimal texture.
- → What are some decoration alternatives?
Consider gummy worms, colored sprinkles, or fresh mint leaves to create a garden-like appearance.
- → Is there a gluten-free option?
Yes, use gluten-free sandwich cookies in place of Oreos to accommodate gluten sensitivities.
- → What utensils are recommended?
A mixing bowl, whisk, food processor or rolling pin, and clear serving cups facilitate easy preparation and presentation.