 Save
Save My neighbor brought over a tin of these cookies last spring, and I was hooked after the first bite—that buttery snap followed by the sweet-tart punch of guava jam felt like a tiny flavor vacation. I'd never considered guava jam as a cookie filling before, but watching her arrange them on the cooling rack, I realized how foolish that had been. The next afternoon, I was in my kitchen with softened butter and granulated sugar, determined to crack the code myself. What struck me most was how simple they were to make, yet they tasted like something you'd find at a proper bakery. Now I make them whenever I want to impress without spending hours at the mixer.
I made these for my daughter's book club last month, and someone actually asked for the recipe before leaving—which never happens at those gatherings. I was nervous about the guava jam at first, wondering if it would be too exotic or unfamiliar, but it turned out to be the star. Everyone kept asking what made them taste so special, as if there was some secret ingredient I was hiding. The truth was just good butter, patience, and fruit that knew exactly what it was doing in that little thumbprint.
Ingredients
- All-purpose flour (2 cups): This is your structural foundation, so don't sift it obsessively—a light stir in the bag before measuring is all you need.
- Salt (1/4 teaspoon): A small pinch that makes the butter taste more buttery and keeps the sweetness from becoming cloying.
- Unsalted butter (1/2 cup, softened): Softness matters here; cold butter will make your life difficult, so leave it on the counter for 30 minutes before you start.
- Granulated sugar (1/2 cup): The sweetness backdrop that lets the guava shine without overwhelming it.
- Large egg (1): Brings everything together and adds just enough moisture to keep the cookies tender rather than crumbly.
- Vanilla extract (1 teaspoon): A gentle whisper of flavor that deepens the butter without announcing itself.
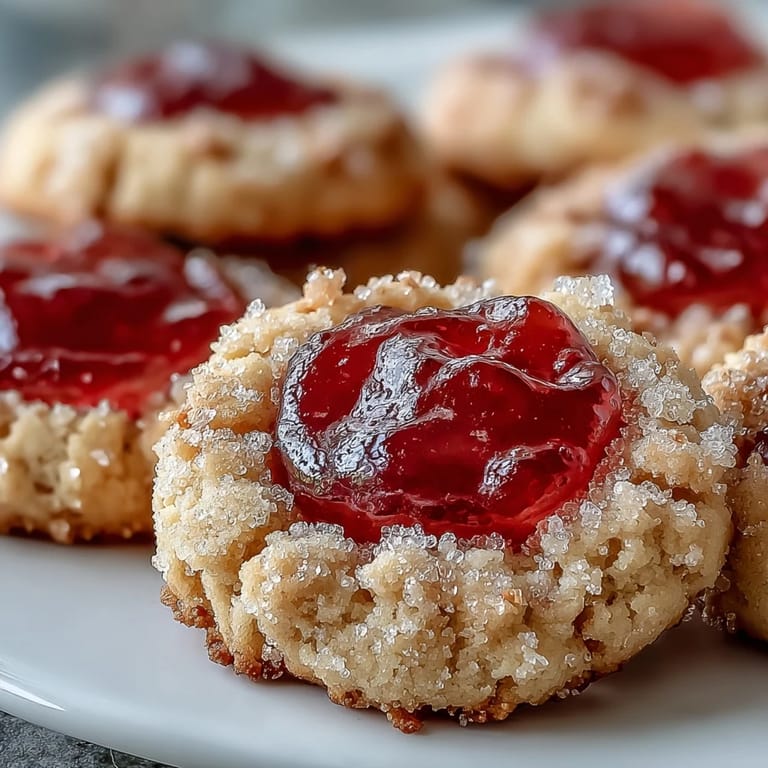
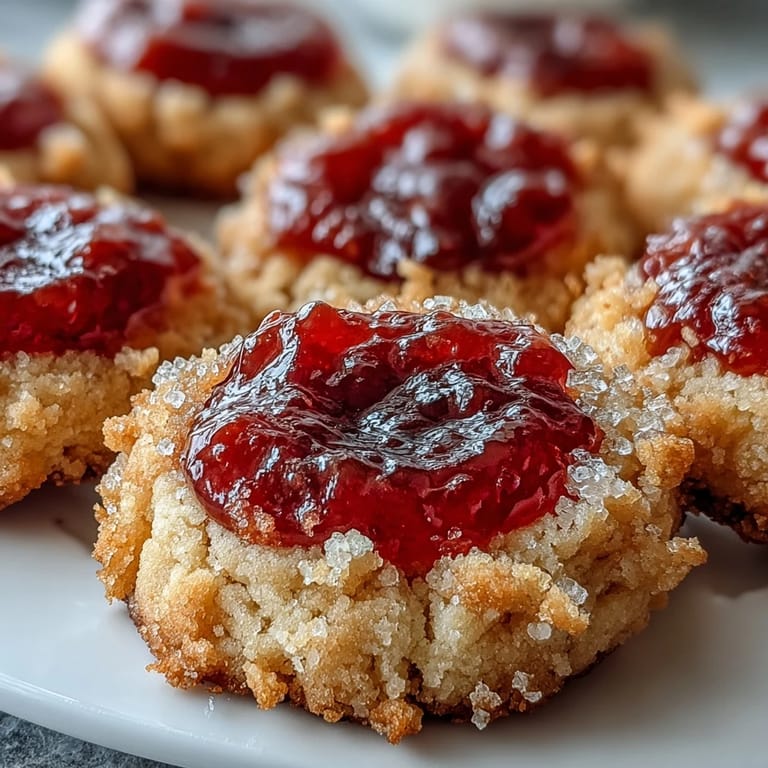
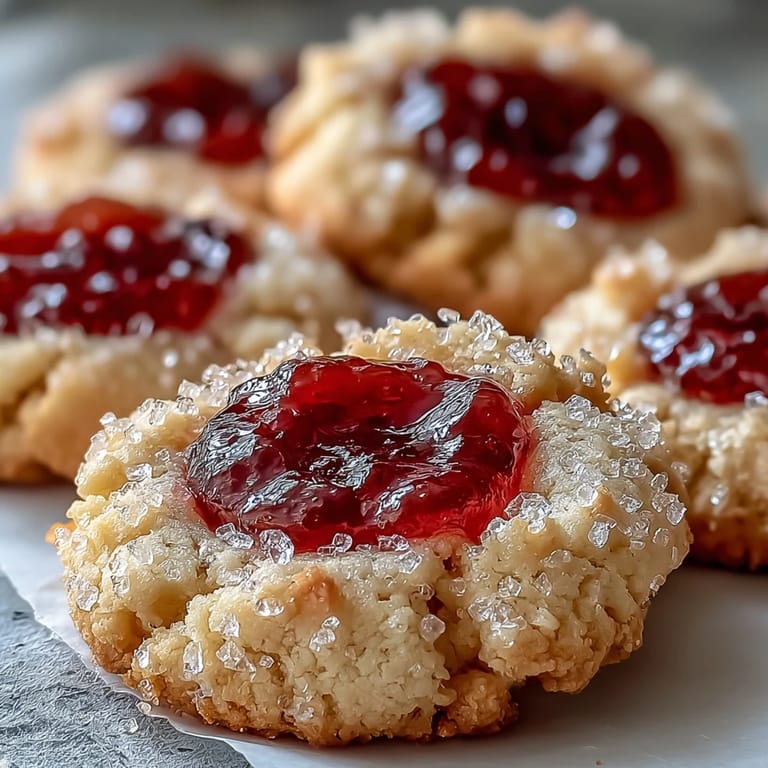
- Guava jam (1/2 cup): The heart of these cookies; buy a good quality jam because you'll taste every bit of it in that little indent.
Tired of Takeout? 🥡
Get 10 meals you can make faster than delivery arrives. Seriously.
One email. No spam. Unsubscribe anytime.
Instructions
- Get your oven and workspace ready:
- Preheat to 350°F and line your baking sheets with parchment paper—this prevents sticking and makes cleanup nearly effortless.
- Combine your dry ingredients:
- Whisk flour and salt together in a medium bowl, then set it aside so it's waiting for you.
- Cream butter and sugar until fluffy:
- Beat them together for about 2 to 3 minutes until the mixture looks pale and airy; this incorporates air that helps the cookies stay tender. You'll know it's ready when it looks almost like frosting.
- Add egg and vanilla:
- Beat them in until everything is completely combined, scraping down the bowl's sides to catch any stubborn butter.
- Bring wet and dry together:
- Add the flour mixture gradually while mixing on low speed, stirring just until no streaks of flour remain. Overmixing at this stage leads to tough cookies, so stop as soon as it comes together.
- Shape the dough balls:
- Scoop tablespoon-sized portions and roll them between your palms until they're smooth and round, then place them 2 inches apart on your prepared sheets. This spacing prevents them from merging into each other while baking.
- Make the thumbprint indents:
- Use your thumb or the back of a teaspoon to gently press a small well into the center of each ball. Go deep enough to hold the jam but not so deep that you're nearly touching the pan underneath.
- Fill with guava jam:
- Drop about 1/2 teaspoon of jam into each indent; don't overfill or it'll bubble out the sides during baking.
- Bake until edges turn golden:
- 13 to 15 minutes is your sweet spot—the edges should be just lightly colored while the centers stay soft and tender.
- Cool with patience:
- Let them rest on the baking sheet for 5 minutes before moving to a wire rack; this prevents them from breaking apart when still too warm.
 Save
Save There's something deeply satisfying about watching these cookies cool on the rack, their little jam centers catching the light like tiny jewels. My kitchen smelled like butter and vanilla and warm fruit, the kind of smell that makes people ask what you're baking before they even see the cookies.
Why Guava Works So Well Here
Guava jam has this wonderful balance of sweet and tart that prevents these cookies from tasting one-dimensional or overly sugary. The tartness cuts through the buttery richness, making you want to eat more than one—which is probably not the most responsible thing to admit, but it's the truth. I've tried substituting with other jams, and while raspberry and apricot are lovely, guava has this tropical personality that makes the cookies feel special rather than ordinary.
Storage and Keeping Them Fresh
These cookies keep beautifully for up to 5 days in an airtight container at room temperature, which is longer than they usually last at my house. I keep mine in a glass jar with a tight seal, and they stay soft and tender the entire time—the jam actually helps keep them moist. If you want to make a double batch, they freeze well too, though I'd recommend freezing them before baking if you want that just-made texture.
Variations and Personal Touches
The beauty of this recipe is how forgiving it is to experimentation. I've tried sprinkling toasted coconut flakes over the jam before baking, which adds a tropical crunch that takes these cookies to another level entirely. Once I even mixed a tiny pinch of cardamom into the dough, which sounds bold but actually complements guava in the most unexpected way.
- For extra tropical flair, sprinkle shredded coconut over each jam indent before sliding the pan into the oven.
- Raspberry or apricot jam work beautifully if guava isn't available, though the flavor personality changes noticeably.
- These make exceptional gifts when arranged in a small box lined with parchment paper, and people always seem impressed.
 Save
Save These cookies have become my go-to when I want to deliver something delicious without spending half my day in the kitchen. They're humble but unforgettable, which is honestly the best kind of cookie to know how to make.
Recipe FAQs
- → What type of jam works best for thumbprint cookies?
Guava jam creates a lovely tropical flavor profile, but you can substitute raspberry, apricot, strawberry, or any fruit preserve you enjoy. Ensure the jam is thick enough to hold its shape during baking without running over the cookie edges.
- → How do I prevent the jam from overflowing during baking?
Fill each indentation with just 1/2 teaspoon of jam—avoid overfilling. The jam will bubble slightly in the oven but should stay contained if you don't exceed the recommended amount. If using a thinner jam, consider chilling the filled dough for 10 minutes before baking.
- → Can I make the dough ahead of time?
Yes, prepare the dough and scoop into balls, then refrigerate for up to 24 hours. Let the dough balls sit at room temperature for 10 minutes before making the indentations and adding the jam. You can also freeze the unbaked dough balls for up to 3 months.
- → Why did my cookies spread too much?
Overly soft butter or warm dough can cause excessive spreading. Ensure your butter is softened but not melted. If your kitchen is warm, chill the shaped dough balls for 15–20 minutes before baking to help them hold their shape.
- → How should I store these thumbprint cookies?
Once completely cooled, store in an airtight container at room temperature for up to 5 days. Place parchment paper between layers to prevent the jam from sticking to other cookies. They can also be frozen for up to 3 months in a freezer-safe container.
- → Can I make these without an electric mixer?
Absolutely. Use a sturdy whisk or wooden spoon to cream the butter and sugar until fluffy—it just takes a bit more elbow grease. The dough is soft enough to mix by hand without requiring any special equipment.