 Save
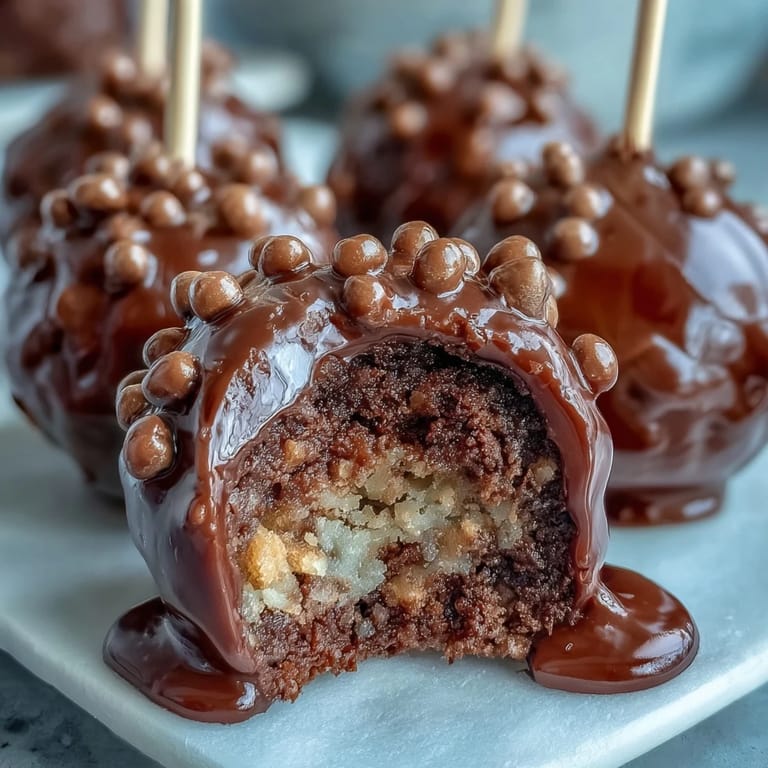
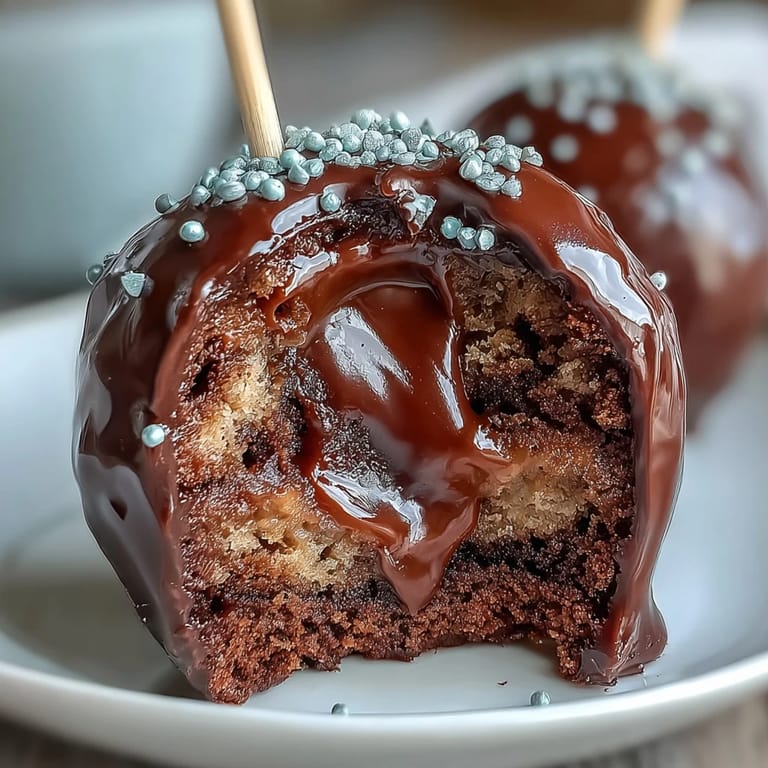
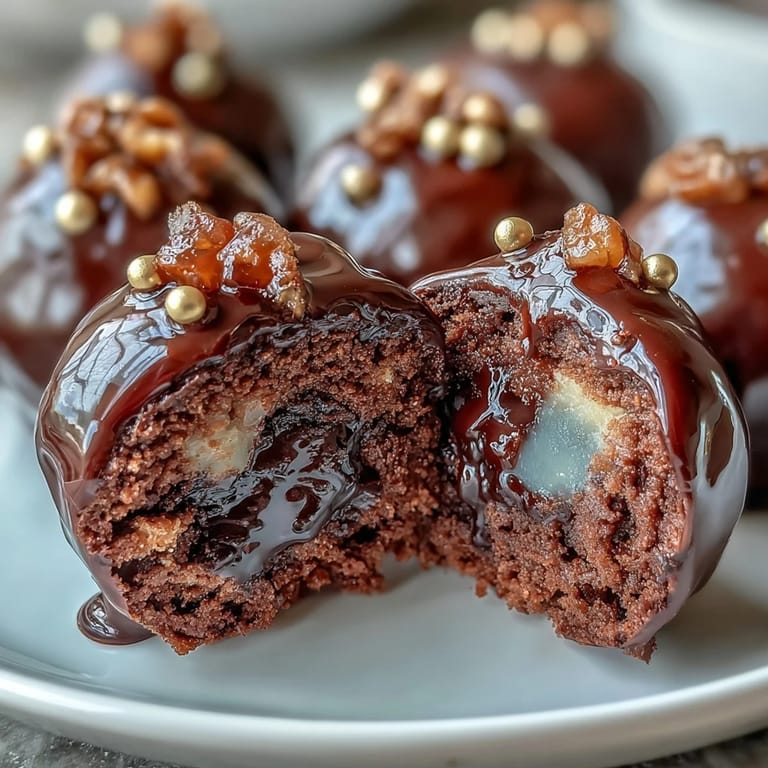
Save My kitchen smelled like chocolate and anticipation the first time I made these Pot of Gold cake pops, standing at my counter on a gray March afternoon when someone mentioned how boring their St. Patrick's Day spread looked. These little edible treasures came together almost by accident, really—crumbled cake mixed with frosting, dipped in black, crowned with gold—and suddenly I had something that made people actually excited about a holiday dessert. The magic is in how simple they are to make, yet how festive they look when you line them all up like tiny pots waiting to be discovered.
I brought a batch to a St. Patrick's Day potluck last year, and watching someone's face light up when they bit into that black shell to find chocolate cake inside felt like watching a small magic trick play out. One woman came back for three more and asked if I'd ever considered selling them, which was both flattering and hilarious since I'd made them for the first time that morning with half a mind on whether the gold would actually stick or just slide off.
Ingredients
- Chocolate cake mix (1 box, 400 g): The foundation of your pops, and honestly, using a quality boxed mix means you skip the guesswork on moisture and crumb structure.
- Chocolate frosting (120 g or ½ cup): This binds everything together and keeps the cake pops tender, so don't skimp on it or your mixture will be dry and crumbly.
- Black candy melts (400 g or 14 oz): These set quickly and cleanly, giving you that perfect glossy pot appearance that makes them look bakery-quality.
- Gold sprinkles or edible gold pearls (48 g or 2 oz): Applied immediately after dipping while the coating is still tacky, these create the illusion of coins spilling from the pot.
- Lollipop sticks (24 sticks): Choose sturdy ones so they don't bend or wobble when your pops are cooling upright.
- White candy melts (50 g or 1.75 oz, optional): Use these for piping decorative details like pot rims if you want to add dimension and contrast.
- Green fondant or sprinkles (optional): A shamrock accent on top brings the full St. Patrick's Day theme home and looks delicate against the black.
Tired of Takeout? 🥡
Get 10 meals you can make faster than delivery arrives. Seriously.
One email. No spam. Unsubscribe anytime.
Instructions
- Bake and cool your chocolate cake:
- Follow the package instructions exactly, and when it comes out of the oven, let it cool completely on a wire rack—warm cake will be too soft to crumble properly. This is where patience pays off, so resist the urge to move forward too quickly.
- Crumble the cake into fine pieces:
- Break it into your mixing bowl using your fingers or a fork until you have uniform crumbs with no large chunks, as lumps will create bumpy, uneven pops. The texture should resemble wet sand.
- Mix in the frosting:
- Add the chocolate frosting gradually, stirring until the mixture holds together when squeezed but isn't sticky—you want it cohesive but workable. If it feels too dry, add a touch more frosting one tablespoon at a time.
- Shape into balls and flatten:
- Scoop the mixture using a small ice cream scoop or your hands and roll each piece into a smooth ball about 1.5 inches in diameter, then gently flatten the top with your thumb to create a subtle pot shape. This flattening makes them look intentional rather than just round.
- Chill the cake balls:
- Refrigerate them on a parchment-lined tray for 30 minutes so they firm up and hold their shape when you dip them. Cold cake pops are much easier to coat without falling apart.
- Prepare your dipping station:
- Melt the black candy melts according to package directions in a microwave-safe bowl, stirring every 30 seconds to avoid overheating. Have your lollipop sticks, styrofoam block or cake pop stand, and gold sprinkles within arm's reach.
- Insert the lollipop sticks:
- Dip the tip of each stick into the melted black candy, then insert it halfway into a cake ball—the melted candy acts as glue to anchor the stick securely. Let them sit for 10 minutes in the fridge to set.
- Dip into the black coating:
- Hold each pop by the stick and submerge it into the melted black candy melts, rotating it gently to coat all sides, then let the excess drip back into the bowl. Work quickly but gently so the coating is even and smooth.
- Stand and decorate immediately:
- Place each dipped pop upright in your styrofoam block while the black coating is still wet and tacky, then immediately sprinkle gold on top before it sets—this is the crucial step that makes them look like overflowing treasure. The warmth of the coating makes the gold stick beautifully.
- Add finishing details:
- Once the black coating is fully set, you can pipe white candy melts around the rim of each pot for a decorative band, or add a green fondant shamrock to the center if you want extra pizzazz. Let everything set completely at room temperature before serving.
 Save
Save There's something genuinely special about watching someone bite into one of these and discovering the rich chocolate cake hiding beneath that black shell, like they've actually found something precious. I've made them now for three celebrations, and they've somehow become the thing people ask me about first.
Storage and Make-Ahead Tips
These cake pops actually get better when you make them a day or two ahead, as the flavors meld and the coating sets harder for a more satisfying bite. Store them in an airtight container at room temperature, keeping them away from direct sunlight or heat sources that might soften the coating. I've found they keep perfectly for up to 3 days, which means you can prep them on a Friday for a weekend party without any stress.
Customizing Your Pots of Gold
The beauty of this recipe is how easily it adapts to your preferences or dietary needs—you can use a gluten-free cake mix and confirm your candy melts are certified gluten-free if that matters for your guests. The gold decoration is really what sells the concept, but if you want something different, edible pearl dust in champagne or silver looks equally elegant against the black. Some people have told me they've added a thin ring of white or green candy melts around the base to mimic a pot handle, which is a clever touch I wish I'd thought of first.
Pairing and Serving Suggestions
These taste magical alongside Irish coffee, which cuts through the richness of the chocolate with just enough bitterness and warmth. They're also lovely with hot chocolate if you're serving a younger crowd, or even with a simple cup of tea for an afternoon treat.
- Set them out on a small platter and watch how quickly they disappear—people treat them like edible jewels worth savoring.
- If you're making a big batch, use different shades of green fondant for the shamrocks to create visual variety.
- A light dusting of edible glitter mixed with the gold sprinkles adds extra shimmer if you're feeling fancy.
 Save
Save These Pot of Gold cake pops are my favorite kind of recipe—the kind that feels like celebration in bite-sized form and leaves everyone wondering how you made them so quickly. Give them a try, and I promise you'll find yourself making them again and again.
Recipe FAQs
- → How can I shape the cake balls to look like pots?
After mixing cake crumbs with frosting, roll the mixture into balls and gently flatten the tops to mimic a pot shape before chilling.
- → What is the purpose of dipping lollipop sticks in melted candy?
Dipping the stick tip helps secure it inside the cake ball, preventing it from falling out after dipping in candy melts.
- → Can I use different candy colors for coating?
Yes, while black candy melts create the classic pot appearance, white or other colored melts can be used for creative accents or themes.
- → How do I store these coated cake balls for best freshness?
Keep them in an airtight container at room temperature for up to three days to maintain texture and flavor.
- → Are there gluten-free options for these treats?
Yes, using gluten-free cake mix and verifying all decorations are gluten-free will accommodate gluten sensitivities.