 Save
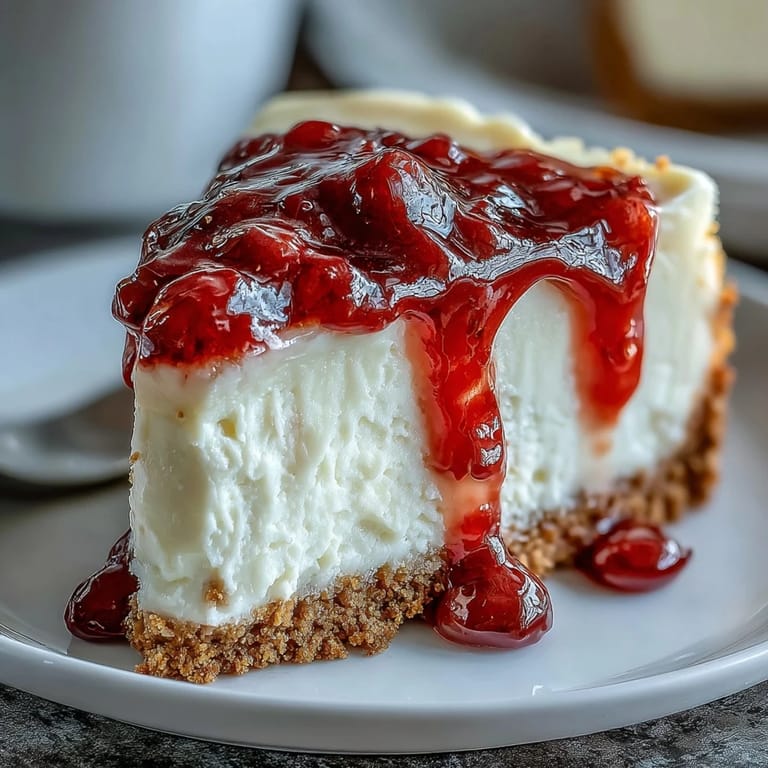
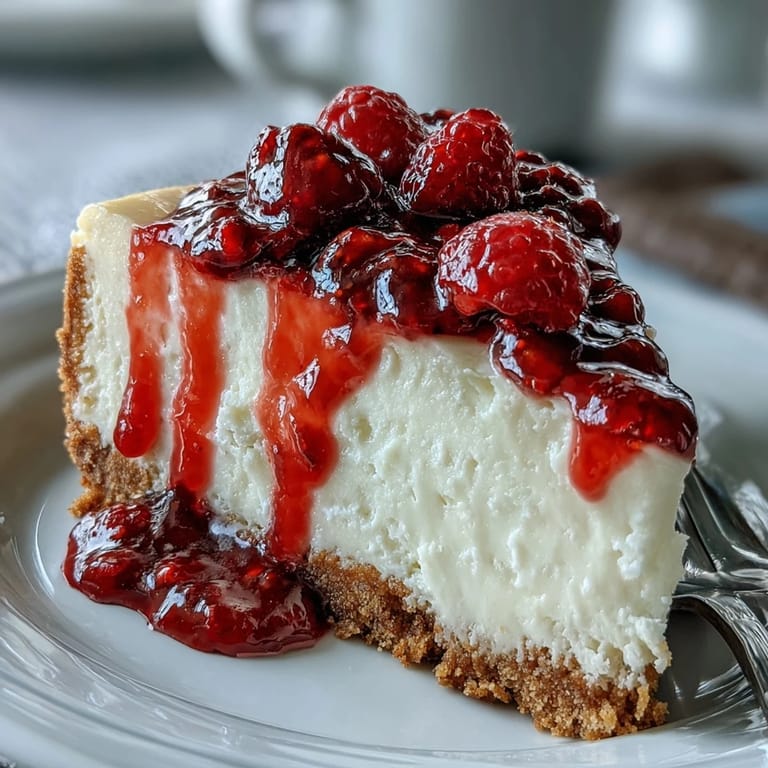
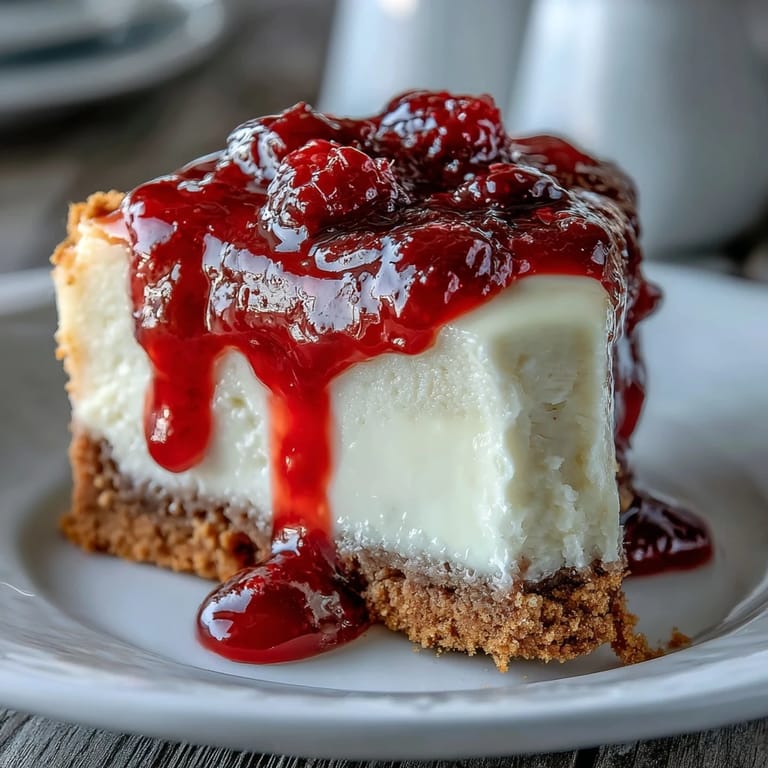
Save My neighbor showed up at my door one rainy Saturday holding a dessert plate and asked if I wanted to try something she'd been perfecting all week. One bite of her white chocolate raspberry cheesecake and I forgot about the laundry piling up in the hallway. The tangy swirl against sweet cream made me beg for the recipe on the spot. She laughed and said it only looked fancy, that anyone with a springform pan and patience could pull it off. I made it the following weekend and she was absolutely right.
I brought this cheesecake to a potluck where three people had already signed up to bring dessert. By the time we cleared the table, mine was the only empty plate. Someone asked if I'd gone to culinary school, and I just smiled because I'd been nervously checking the oven timer every ten minutes that morning. The compliments felt generous, but mostly I was relieved the center hadn't cracked and the swirls looked intentional instead of chaotic.
Ingredients
- Graham cracker crumbs: The buttery base that holds everything together, press it down hard or it'll crumble when you slice.
- Granulated sugar: Used in the crust, filling, and raspberry sauce to balance tartness and add structure.
- Melted butter: Binds the crumbs into a firm, golden crust that won't fall apart under the creamy weight above.
- Fresh or frozen raspberries: Frozen works just as well and is often cheaper, just let them thaw and drain excess liquid first.
- Lemon juice: Brightens the raspberry sauce and keeps it from tasting flat or one dimensional.
- White chocolate: Choose a good quality bar, not chips, because it melts smoother and tastes less waxy.
- Cream cheese: Let it sit at room temperature for at least an hour so it beats without lumps.
- Large eggs: Add them one at a time and beat gently to avoid incorporating too much air, which causes cracks.
- Vanilla extract: A small splash deepens the flavor without competing with the white chocolate.
- Sour cream: Adds tang and a silky texture that makes each bite melt on your tongue.
- Heavy cream: Loosens the batter just enough to swirl the raspberry sauce without it sinking straight to the bottom.
Tired of Takeout? 🥡
Get 10 meals you can make faster than delivery arrives. Seriously.
One email. No spam. Unsubscribe anytime.
Instructions
- Prep the pan and preheat:
- Set your oven to 325°F and grease a 9 inch springform pan, then line the base with parchment so the cheesecake releases cleanly. This step saves you from prying it out later with a spatula and ruining the edges.
- Build the crust:
- Mix graham cracker crumbs, sugar, and melted butter until it looks like wet sand, then press it firmly into the pan bottom. Bake for 8 minutes to set it, then let it cool completely before adding batter.
- Make the raspberry swirl:
- Simmer raspberries, sugar, and lemon juice in a small saucepan over medium heat, stirring often until it thickens into a jammy sauce. Strain out the seeds if you want it smooth, then let it cool while you work on the batter.
- Melt the white chocolate:
- Use a double boiler or microwave in short bursts, stirring between each interval until glossy and smooth. Let it cool slightly so it doesn't scramble the eggs when you fold it in.
- Beat the cream cheese base:
- Whip softened cream cheese and sugar until fluffy and lump free, then add eggs one at a time, beating just until blended. Stir in vanilla, sour cream, and heavy cream, then fold in the melted white chocolate gently.
- Layer and swirl:
- Pour half the batter over the cooled crust, dollop spoonfuls of raspberry sauce on top, and drag a knife through to create swirls. Add the rest of the batter, more sauce, and swirl again without overdoing it or the colors will muddy.
- Prepare the water bath:
- Wrap the outside of the springform pan tightly in two layers of foil to keep water out, then set it in a larger roasting pan. Pour hot water into the roasting pan until it reaches halfway up the sides of the springform.
- Bake low and slow:
- Slide the whole setup into the oven and bake for 60 to 70 minutes, until the edges look set but the center still jiggles slightly when you nudge the pan. The water bath keeps the heat gentle and prevents cracks.
- Cool gradually:
- Turn off the oven, crack the door open, and let the cheesecake sit inside for an hour to cool slowly. Pull it from the water bath, then refrigerate uncovered for at least 4 hours or overnight.
- Release and serve:
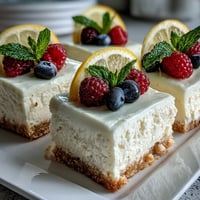
- Run a thin knife around the edge before unlatching the springform, then transfer to a plate. Garnish with extra raspberry sauce or fresh berries, slice with a hot, clean knife, and watch it disappear.
 Save
Save The first time I made this for my brother's birthday, he asked if I'd bought it from the fancy bakery downtown. I told him the truth and he didn't believe me until I showed him the messy springform pan still soaking in the sink. That moment when someone thinks you're lying about making something from scratch is oddly one of the best compliments a home baker can get.
Choosing Your White Chocolate
Not all white chocolate behaves the same when melted. I learned this after a batch seized into a grainy mess because I used cheap chips with too many stabilizers. Look for bars labeled couverture or ones that list cocoa butter as the first ingredient after sugar. They melt into silk and taste like actual cream instead of waxy sweetness. If you can find Ghirardelli or Lindt white chocolate bars, grab them, they're worth the extra dollar and make a noticeable difference in both flavor and texture.
Getting Clean Slices Every Time
I used to serve cheesecake slices that looked like they'd been hacked apart with a butter knife. Then a friend who worked in a restaurant kitchen told me the secret: hot water and a towel. Dip your knife in a tall glass of very hot water, wipe it completely dry, then make one smooth cut straight down. Rinse, dry, and repeat for every single slice. It takes an extra two minutes but turns a homemade dessert into something that photographs like a magazine cover.
Make Ahead and Storage Tips
This cheesecake actually tastes better the day after you make it because the flavors have time to settle and meld. I always bake mine the night before I need it, let it chill overnight, and add the garnish right before serving. It keeps in the fridge for up to five days if you cover it loosely with plastic wrap, though it rarely lasts that long in my house. You can also freeze individual slices wrapped tightly in foil for up to two months, then thaw them in the fridge for a quick dessert emergency.
- Let the cheesecake come to room temperature for 20 minutes before serving so the texture softens and the flavors open up.
- Store any leftover raspberry sauce in a small jar in the fridge and drizzle it over pancakes or yogurt during the week.
- If the top cracks despite your best efforts, just cover it with extra berries and sauce, no one will ever know.
 Save
Save There's something quietly triumphant about pulling a perfect cheesecake from the fridge and knowing you made it with your own hands. It's the kind of dessert that turns an ordinary evening into a small celebration, no special occasion required.
Recipe FAQs
- → Can I use frozen raspberries instead of fresh?
Yes, frozen raspberries work perfectly. They may release more liquid during cooking, so simmer a bit longer to achieve the thick sauce consistency needed for swirling.
- → Why is a water bath necessary for this cheesecake?
The water bath creates gentle, even heat that prevents cracking and ensures a silky, smooth texture throughout. Wrapping the pan in foil prevents water from seeping into the crust.
- → How do I prevent the cheesecake from cracking?
Avoid overmixing the batter after adding eggs, use a water bath, and allow gradual cooling by leaving it in the turned-off oven for an hour before refrigerating.
- → Can I make this cheesecake ahead of time?
Absolutely. This dessert actually improves when made a day ahead, allowing flavors to meld. Store covered in the refrigerator for up to 5 days.
- → What type of white chocolate works best?
Use high-quality white chocolate with cocoa butter as the first ingredient. Avoid white baking chips, as they contain stabilizers that affect melting and flavor.
- → How do I achieve clean slices when serving?
Dip a sharp knife in hot water, wipe it dry, then make your cut. Clean and reheat the knife between each slice for picture-perfect presentation.