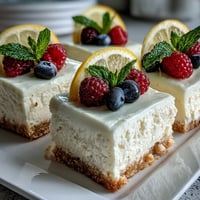
Save
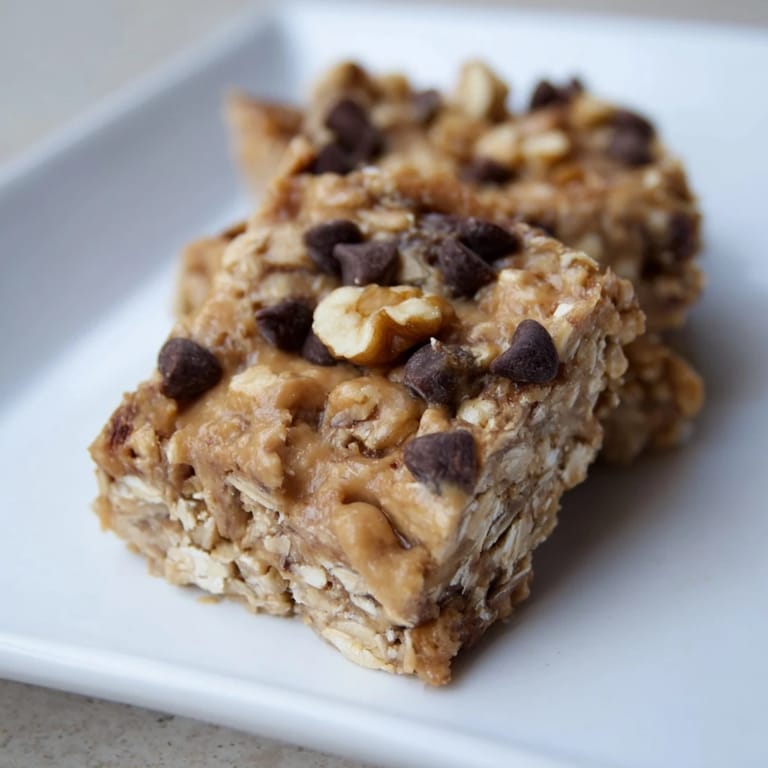
Save I discovered these bars on a Tuesday morning when I was frantically searching my pantry for something to quiet my growling stomach before a long meeting. What I found instead was ripe bananas about to go brown and a jar of peanut butter that had been calling my name for weeks. Twenty minutes later, I had a batch of these chewy, wholesome bars cooling in the fridge—and suddenly my entire week felt manageable. Now they're my go-to answer whenever someone asks what I'm bringing to a gathering.
My friend Marcus showed up to our hiking trip looking skeptical when I handed him one of these bars wrapped in foil. Fifteen minutes into the trail, he asked for another—then wanted the recipe before we'd even reached the summit. Now whenever we plan an outdoor adventure, he texts asking if I'm bringing them. There's something deeply satisfying about feeding people something you made with your own hands that genuinely makes them feel better.
Ingredients
- Ripe bananas: Choose ones with soft spots and yellow skin—they're sweeter and mash more easily than firm ones, and that sweetness is what makes these bars feel indulgent without added sugar.
- Creamy peanut butter: Don't reach for the natural stuff with the oil slick on top unless you enjoy a greasier bar; regular creamy peanut butter gives you the right texture and flavor.
- Honey or maple syrup: Both work beautifully, though honey binds things together slightly better if you're being technical about it.
- Vanilla extract: A teaspoon sounds small, but it rounds out the flavor in a way that makes people ask what you did differently.
- Old-fashioned rolled oats: The key word is old-fashioned—instant oats will turn into mush, and steel-cut oats are too chunky for these bars.
- Salt: Just a pinch to make everything taste more like itself, especially important when you're relying on whole foods.
- Cinnamon: Adds warmth and depth without tasting like cinnamon overkill.
- Nuts and chocolate chips: Optional but seriously worth it—they give you something to bite into and make the bars feel more special.
Tired of Takeout? 🥡
Get 10 meals you can make faster than delivery arrives. Seriously.
One email. No spam. Unsubscribe anytime.
Instructions
- Set up your workspace:
- Line an 8x8-inch pan with parchment paper, letting the edges hang over the sides like handles. This small step saves you from frustration later when you're trying to wrestle the bars out of the pan.
- Mash the bananas:
- Use a fork or masher to break them down until mostly smooth—a few small lumps are fine and actually nice textually. You're looking for the consistency of soft applesauce.
- Build your wet base:
- Stir the peanut butter, honey, and vanilla into the bananas until everything is creamy and well combined. Don't skip the stirring part; getting this foundation right makes the rest effortless.
- Fold in the dry ingredients:
- Add oats, salt, cinnamon, and any mix-ins you're using, stirring until the mixture looks evenly distributed with no dry pockets. This is when your kitchen smells absolutely irresistible.
- Press into the pan:
- Transfer everything to your prepared pan and use the back of a spoon or spatula to press it down firmly and evenly. The pressure helps the bars hold together when you cut them later.
- Chill and set:
- Refrigerate for at least an hour, though overnight is even better if you have time. The cold makes them firm enough to cut cleanly.
- Slice and store:
- Use the parchment handles to lift the whole thing out, then slice into 12 bars with a sharp knife. Keep them in an airtight container in the fridge where they'll stay fresh for a full week.
 Save
Save My cousin once told me that these bars reminded her of the energy bars her mom used to make for her soccer tournaments, except better because they didn't taste like compressed sadness. That comment stuck with me because it's exactly what I was aiming for—real food that happens to be convenient, nothing apologetic about it.
The Magic of No-Bake Snacks
There's something liberating about making something delicious without heating your kitchen or watching the oven. On hot summer days, I'll make these bars instead of baking, and there's always a moment of relief when I realize I don't have to deal with an extra 350 degrees in the house. Plus, the cold fridge time actually improves them—they firm up and become even more satisfying to bite into.
Customization Without Overthinking
I've made these bars with almond butter, sunflower seed butter, and even tahini on an experimental afternoon when I was out of peanut butter. Each version tasted different but equally good, which tells you something important: this recipe is forgiving and flexible. You can add dried cranberries, swap the chocolate chips for granola, or fold in some unsweetened coconut flakes without ruining anything. The base is strong enough to support your preferences.
Why These Bars Work for Every Occasion
I've brought these to potlucks where people assumed they were store-bought, tucked them into my gym bag before early morning workouts, and even served them at a dinner party when someone asked for dessert. They work because they straddle the line between snack and treat, wholesome and indulgent, quick to make and elegant enough to serve. The banana and peanut butter combination is nostalgic without feeling childish, and the oats make them feel substantial.
- Wrap individual bars in wax paper to stack them neatly and grab one on your way out the door.
- If your kitchen is warm, keep them in the freezer instead of the fridge—they thaw within a few minutes and actually taste better cold.
- Make a double batch and freeze the extras wrapped well; they last for at least three weeks and taste freshly made when you thaw them.
 Save
Save These bars have become my answer to the question of what to feed people when I want them to feel taken care of without spending hours in the kitchen. They're proof that simple ingredients and a little bit of intention can create something genuinely nourishing.
Recipe FAQs
- → Can I substitute peanut butter with other nut butters?
Yes, almond or sunflower seed butter can be used as alternatives for a different flavor and to accommodate allergies.
- → How long should the bars chill for best texture?
Refrigerate the bars for at least 1 hour to allow them to firm up sufficiently for easy slicing.
- → Are there vegan-friendly sweetener options?
Maple syrup is a great vegan-friendly alternative to honey for sweetening the bars naturally.
- → What optional mix-ins work well?
Chopped walnuts, pecans, or mini chocolate chips add texture and flavor to the bars but are optional.
- → How should the bars be stored?
Store in an airtight container in the refrigerator for up to one week to maintain freshness and chewiness.